-
Your shopping cart is empty!
MENU
Your shopping cart is empty!
Hey beaders and crafty people!
Today i'm gonna show you how you can make your very own earwires using jewellery wire or craft wire. It's so quick and easy to do and it can be a lifesaver if you start making a pair of earrings and realise half way through you've run out of earwires (yes, i've gotten myself into this pickle numerous times!). Not only that, but you have complete control of their Shape, style and size. You can use any kind of craft wire, although it's worth using wire that's free from nickel as this can be irritating to sensitive ears. Make sure the wire you use is a minimum of 22 gauge (0.6mm) to ensure your earwires are sturdy. If you're working with a particurlarly hard wire you can get away with 24 gauge (0.511mm).
Once you've mastered this technique with craft wire which is relatively inexpensive, you can move on to more precious wires such as sterling Silver, Gold filled and karat gold which are more suitable for use with Semi-Precious/precious gemstones.
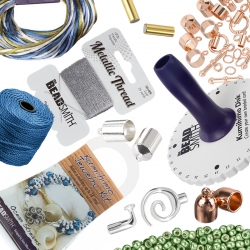
Things you will need for this tutorial:
Here i've made the regular shaped fish hook earwires in a standard size. If you want to create larger ones, simply cut a longer length of wire. It takes a little experimenting to begin with when creating different Shapes and sizes but that's half the fun i say! Ok, here we go......
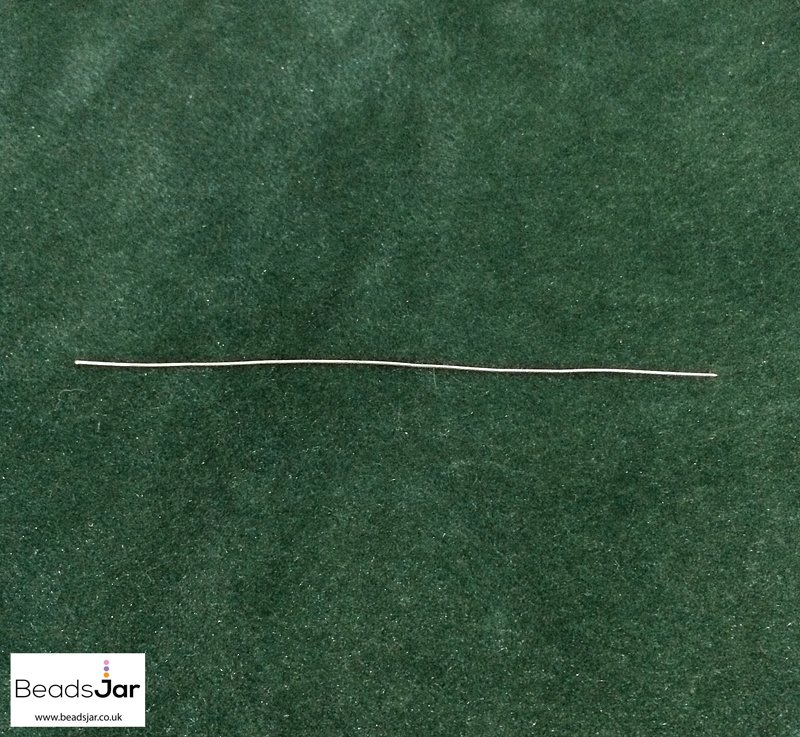
Step 1
Cut a length of wire to four inches.
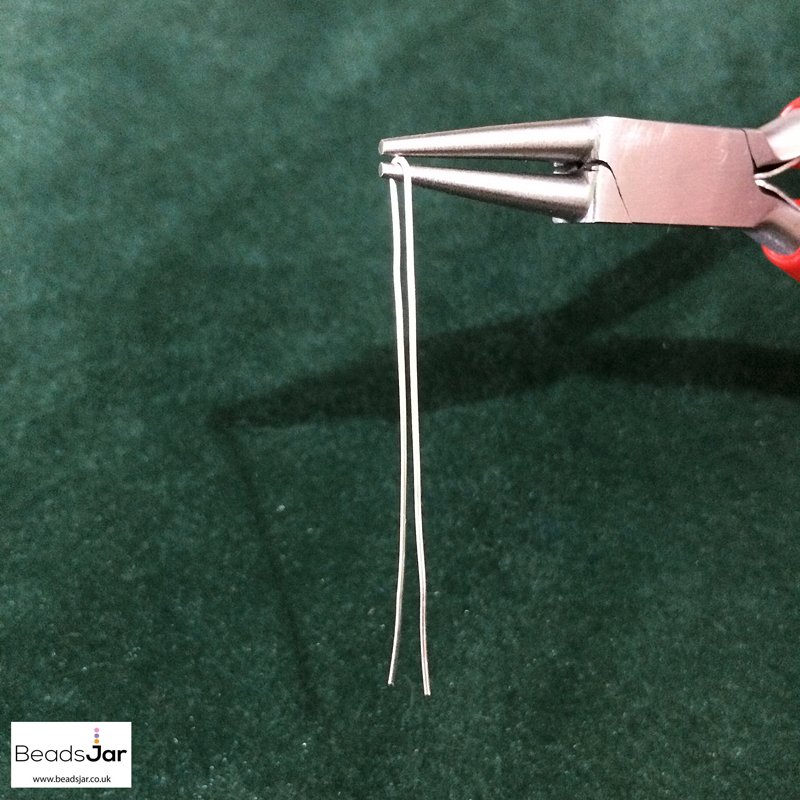
Step 2
Take a pair of round nose pliers and bend the wire in half as close to the tip of the pliers as you can.
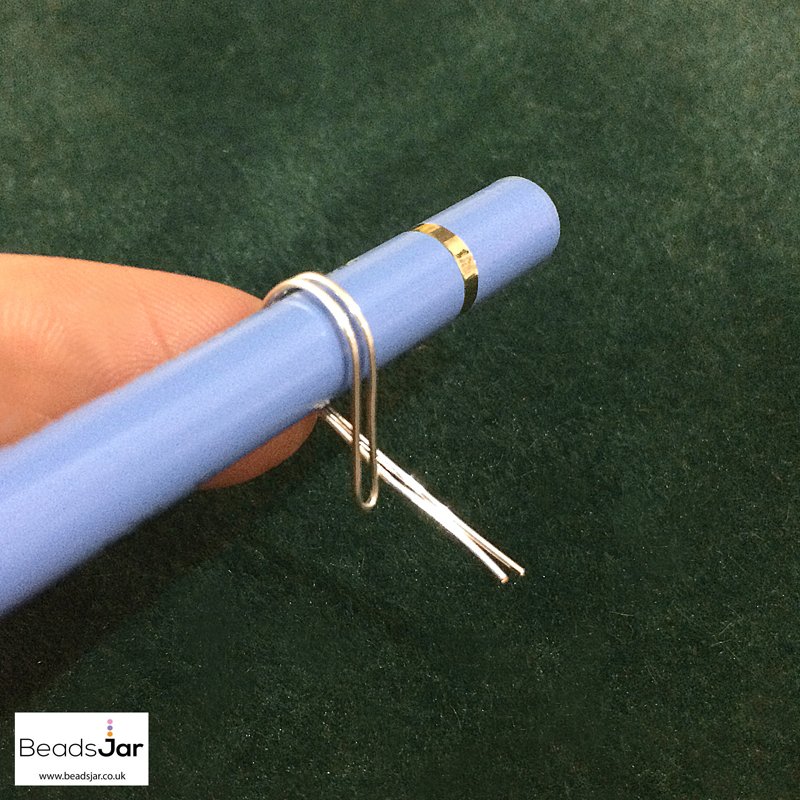
Step 3
Next, we're going to shape the wire around your chosen smooth edged pen/pencil (i've used a regular Faber Castel colouring pencil here). Do this by placing the wire over the top of the pencil, positioning the pencil just off the center to the right, making sure the side with the bend we just made is also to the right. See the image below. Keep a good tension when you're pulling the wire around to ensure a smooth curve.
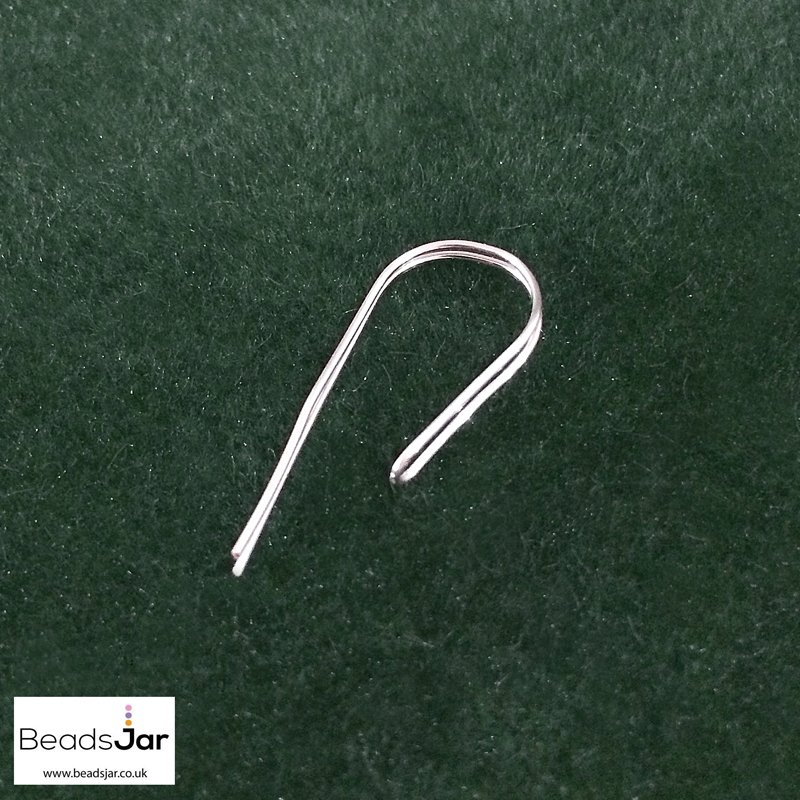
Step 4
This is what you should be looking at at this point.
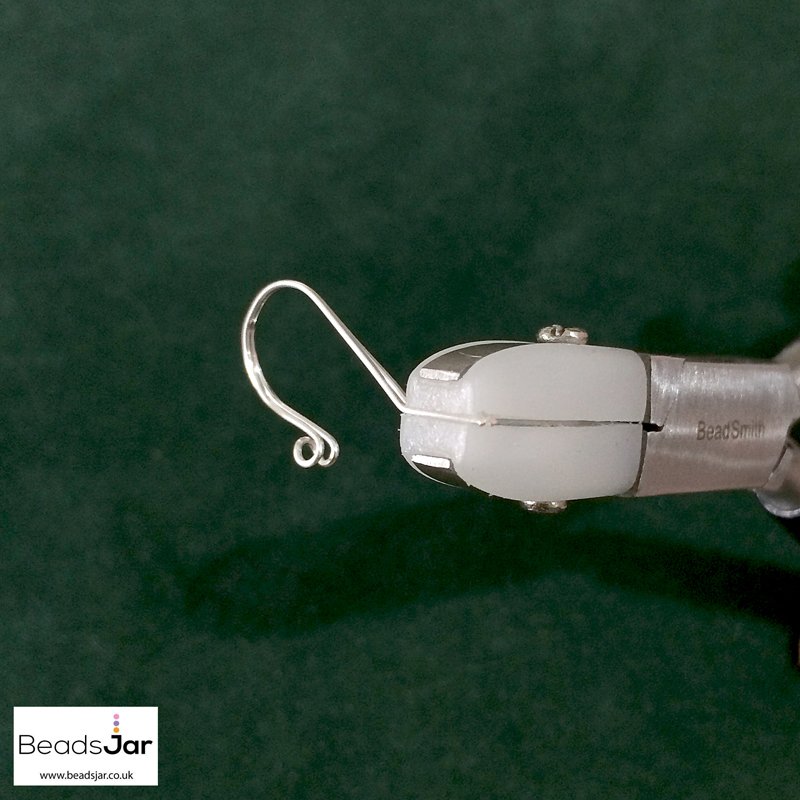
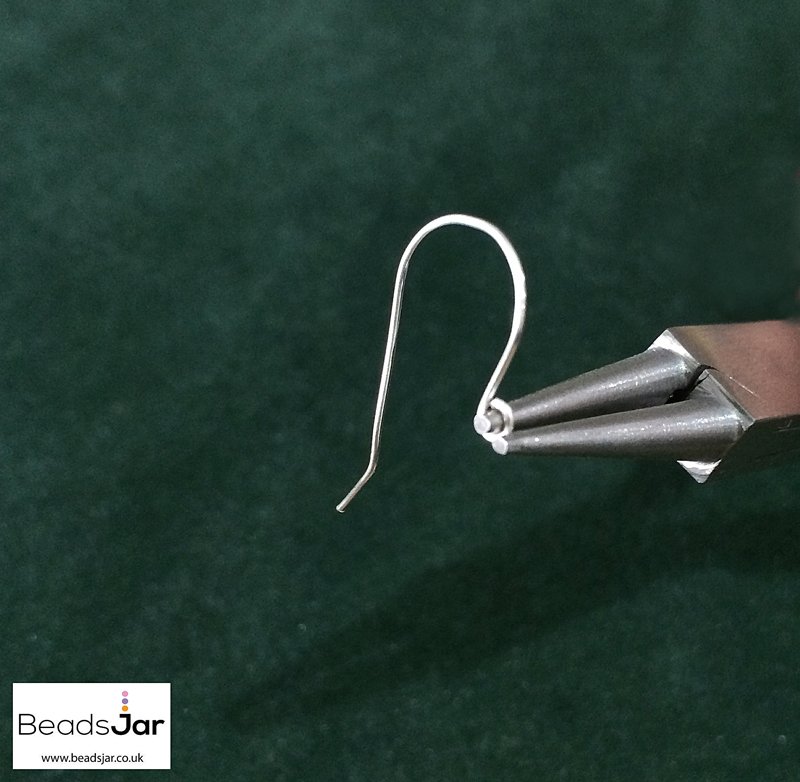
Step 5
Now take your round nose pliers, place across the bend as close to the end as possible and curl up and around to create a small loop. Stop just before completing the loop leaving a small gap.

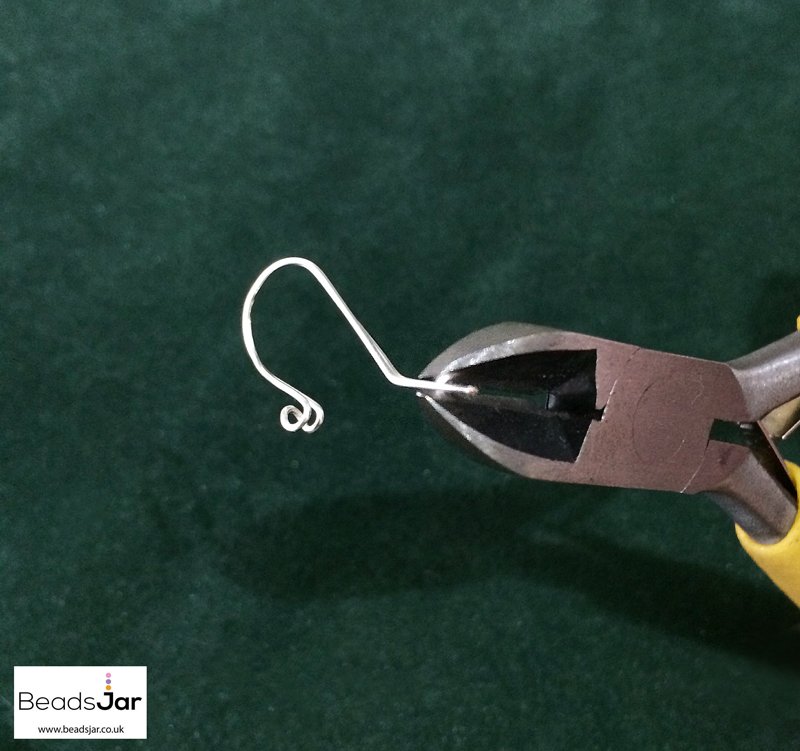
Step 6
Using flat nose pliers, bend the last cm of the two wire tips outwards slightly.
Step 7
Trim 5mm off the ends with wire cutters leaving a 5mm bend at the end of your earwires. This just helps when pushing the earwires through the ear piercing.
Step 8
Use your wire cutters to cut the bend at the top of your loop, seperating the wires. Hey look.....You've got two ear wires now!
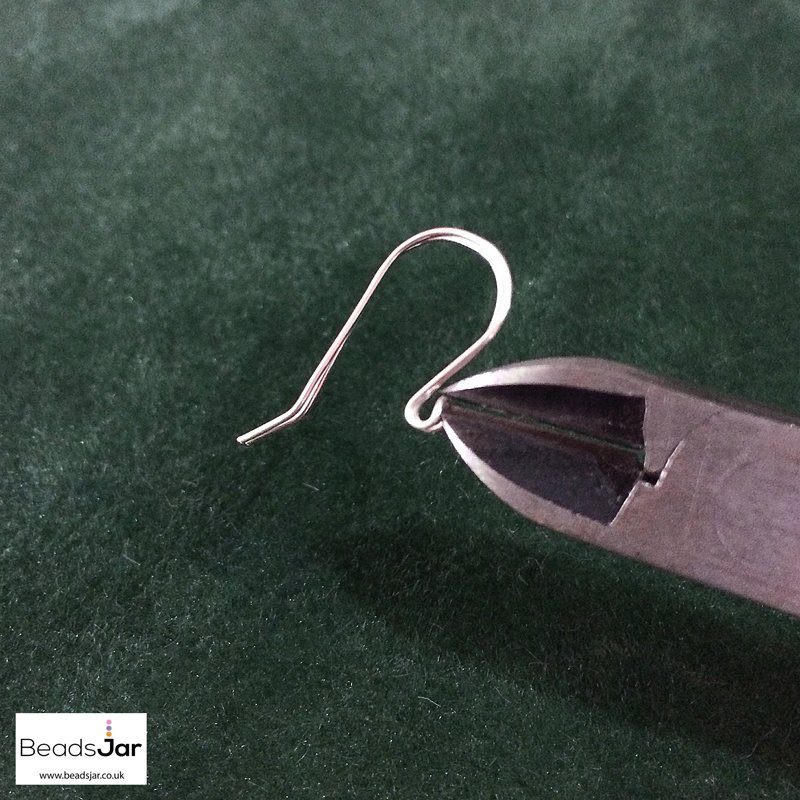
Step 9
Trim off the very end of the wire (where it has been bent around). This should leave you with an almost complete loop. Repeat this step on the other earwire.
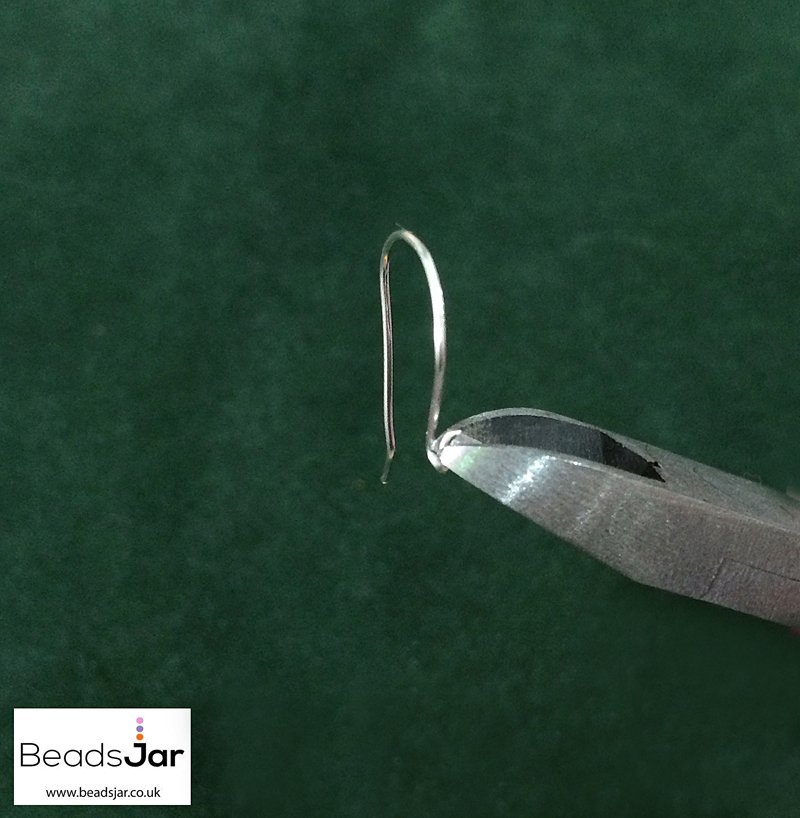
Step 10
Use your round nose pliers to shape the wire around to complete the loop. Repeat this step on the other earwire.
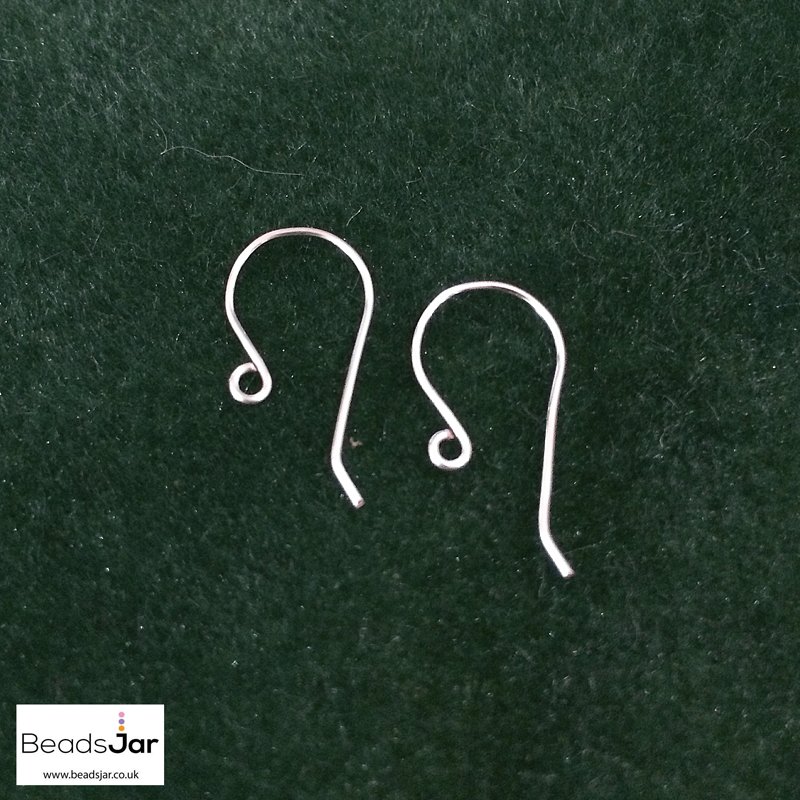
There you have it! A pair of handmade earwires created by you. You clever thing!
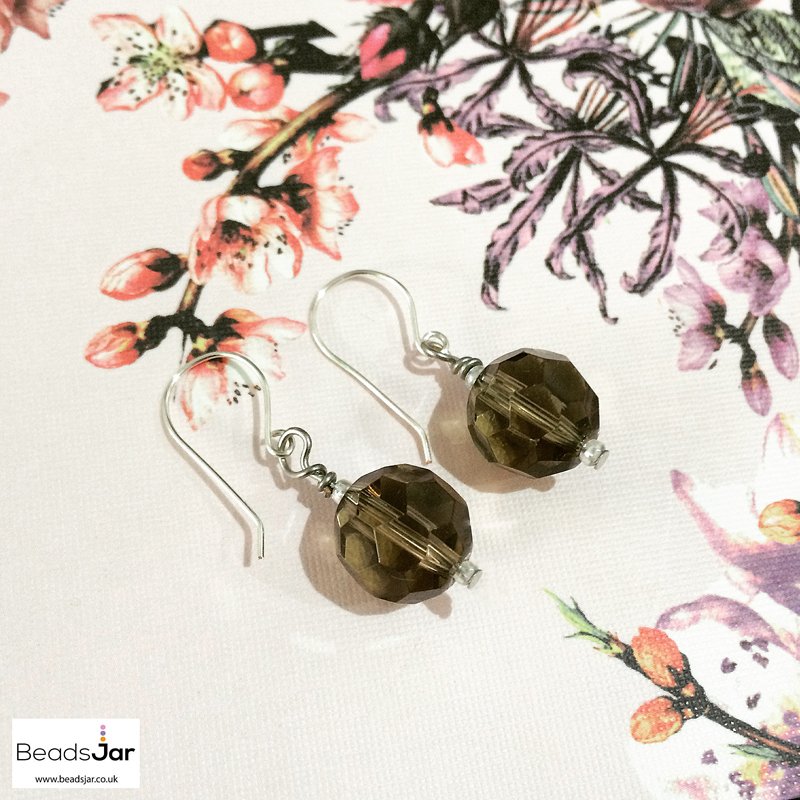
When you want to attach them to your wire wrapped beads and earring dangles, just open the loop with round nose pliers, hook them on and close.
Did you have fun making these? Why not try experimenting with different shapes and sizes? You could try making some long fancy earwires....just double your length of wire and experiment with where you shape it around your pencil. Or try using a thicker object such as a marker to create more rounded earwires. The possibilities are endless! We have a great collection of craft wires in a whole rainbow of colours that keeps expanding all the time. Shop here for craft wire.
If you have any questions please drop me a comment below...don't be shy.
See you guys later!
Emma
xo


2 Comment(s)
Hi Emma, This was my first time making earwires and your blog was sooooooooooooo helpful. It was super easy to follow and fun to make. I am excited for your next blog!! <3 Lots of love Sara :D
Amazing DIY! Really you are so talented. I am totally impressed with your work. I can’t wait to try this. Thanks and keep sharing.
Leave a Comment