-
Your shopping cart is empty!
MENU
Your shopping cart is empty!
Afternoon people!
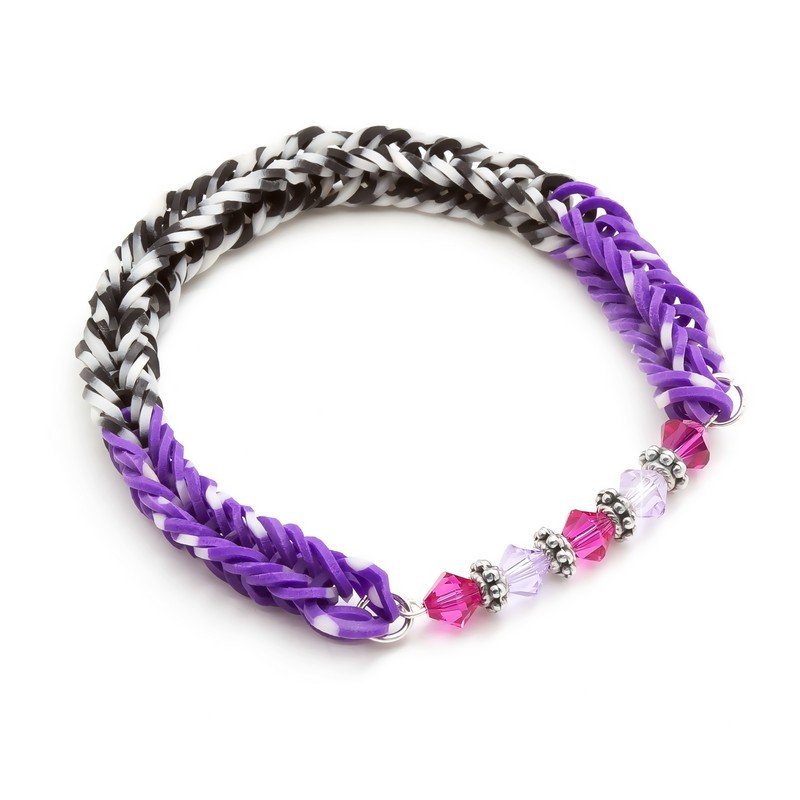
It's Friday.....wahoo! So my challenge this week was to create a bracelet using Loom Bands that would appeal to us grown ups. Now at first i will admit, i was rather dismayed. To me, Loom Bands conjured up images of giant neon explosions :0 I should also mention prior to this little project, i'd never even touched a loom band before (a statement which caused the rest of Beads Jar HQ to look at me like i was some sort of alien creature from Mars). But hey, i'm all for trying something new as more often than not, i end up enjoying things that i'm not too enthusiastic about starting...
I had a look at some of the basic Loom Band stitches and decided the fishtail was the one that was going to work best for what i had in mind. It's simple and creates a really full looking bracelet without any gaps. Rather than make something in the typical flourescent colours associated with these tiny rubber delights, i decided to go with a monochrome colour scheme with colourful accents and a sparkly Swarovski Crystal focal spacer to sit in the center.
After having a few practice runs with the fishtail stitch using my fingers, i decided to have a go at it using a couple of pencils to see if i could get a more uniform finish....and success! It created a much neater bracelet and got rid of achey fingers. As always i photographed my steps as i went so if you're a loom band newbie like i was (shock horror!;) you can follow them and have a go at making your own....
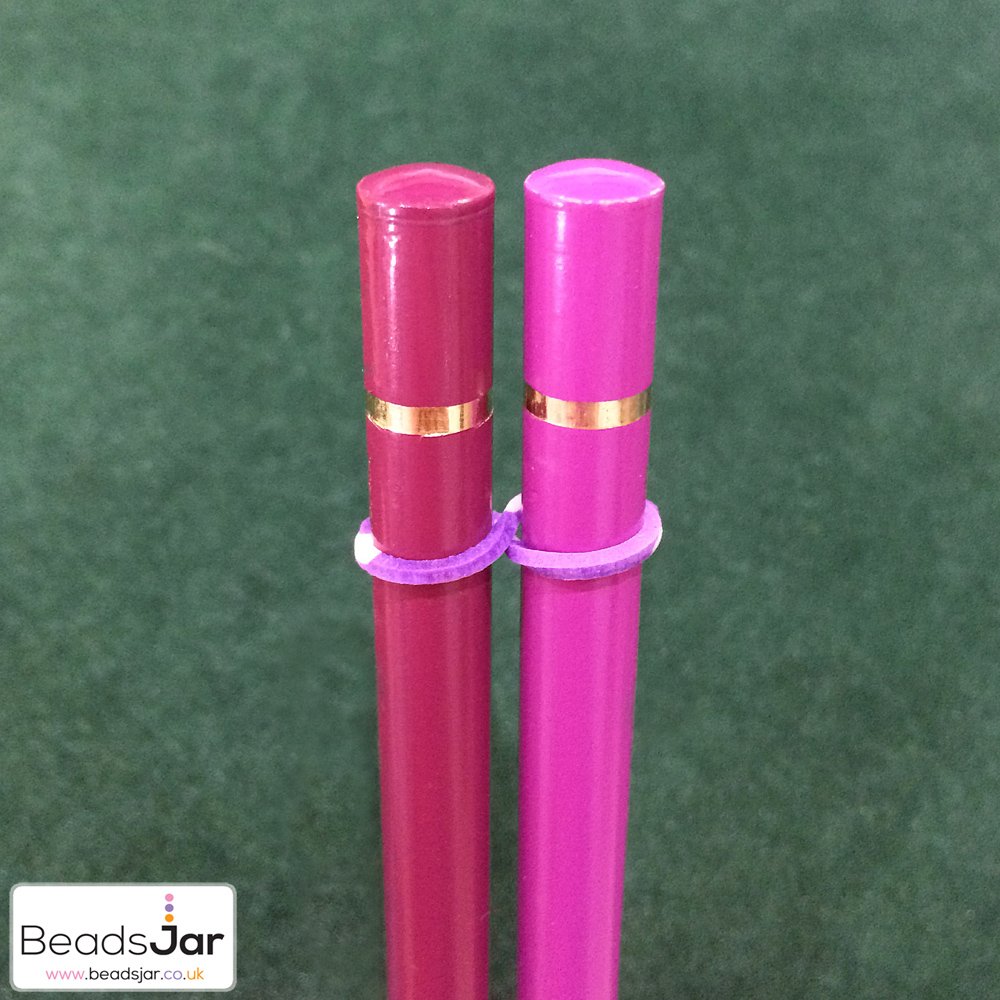
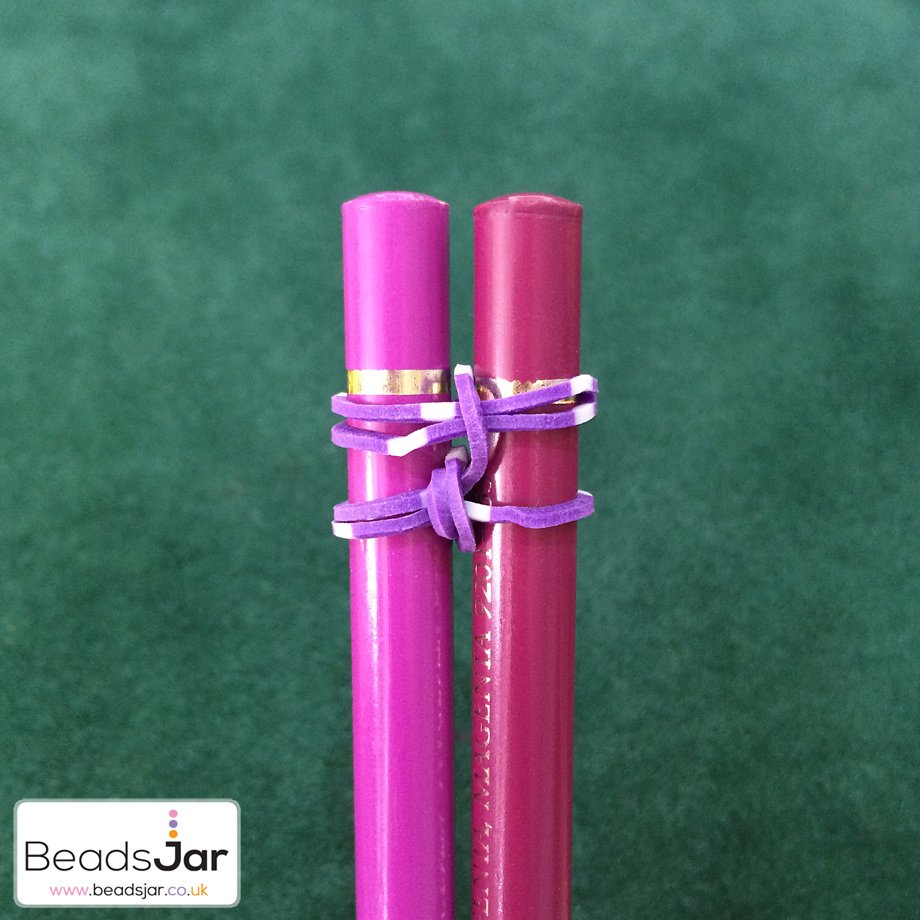
Step 1
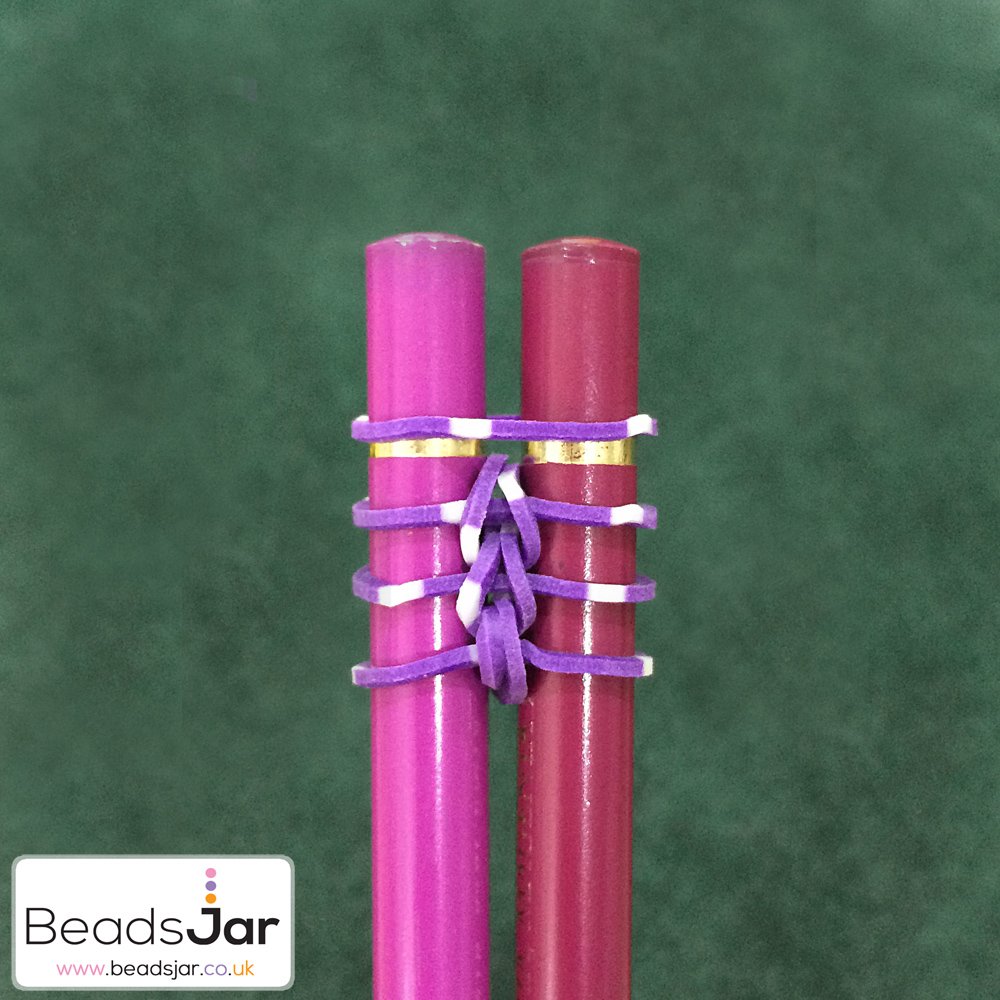
Create a figure 8 with a Purple loom band by crossing it over in the center. Then secure this onto your two pencils.
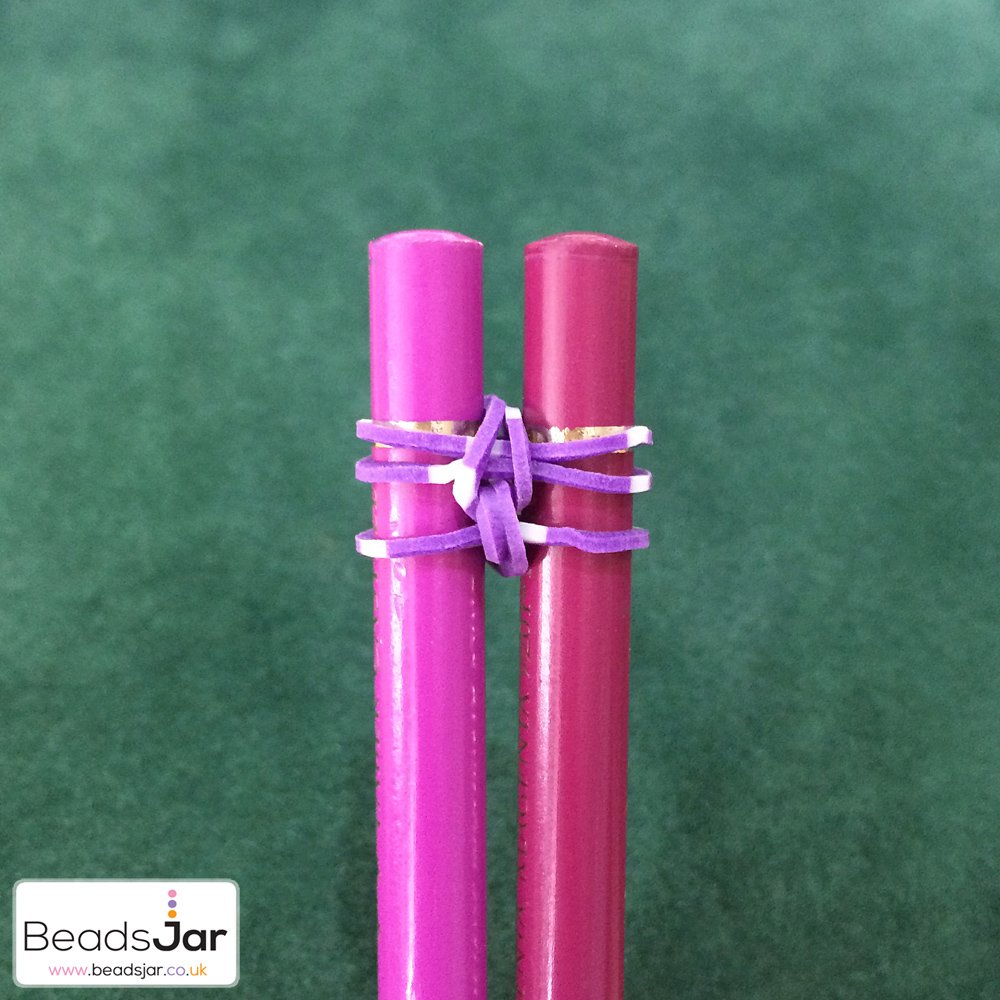
Step 2
Place 2 more purple loom bands over the top.
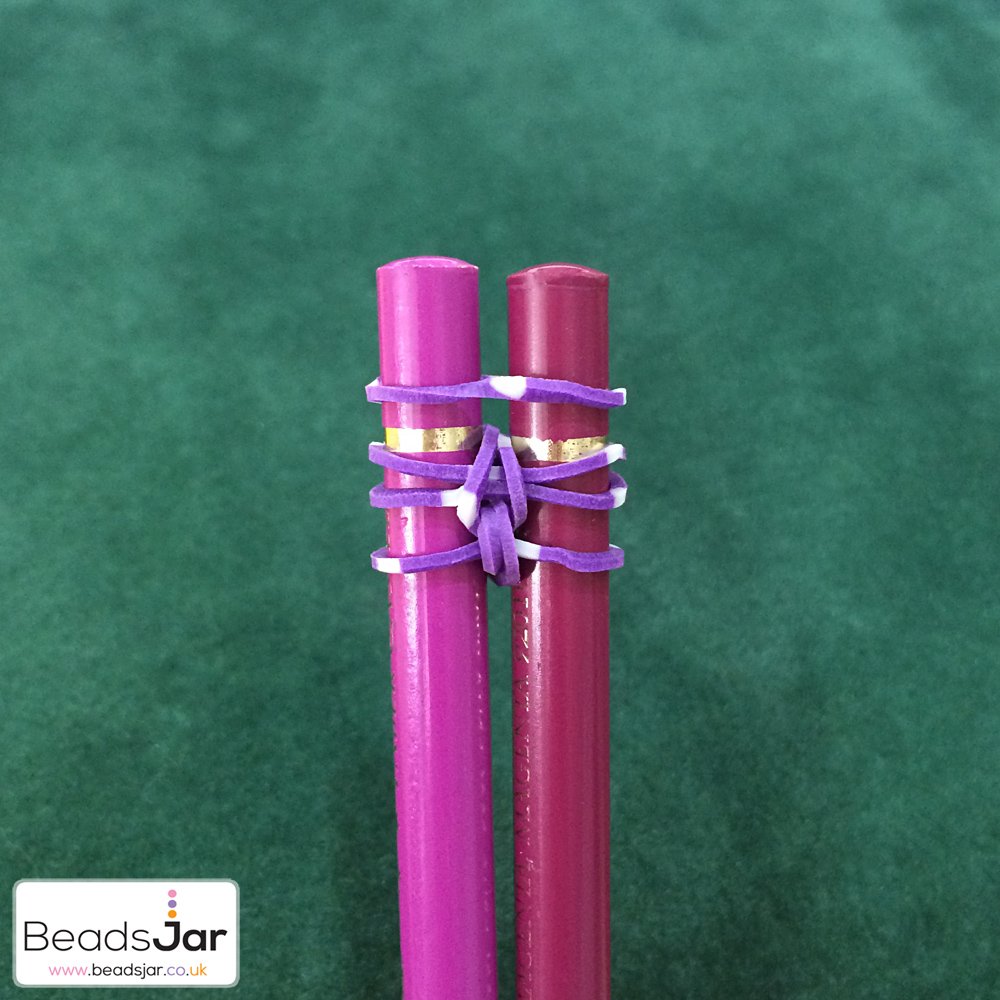
Step 3
Pull the band on the bottom right over the top of the two bands above.
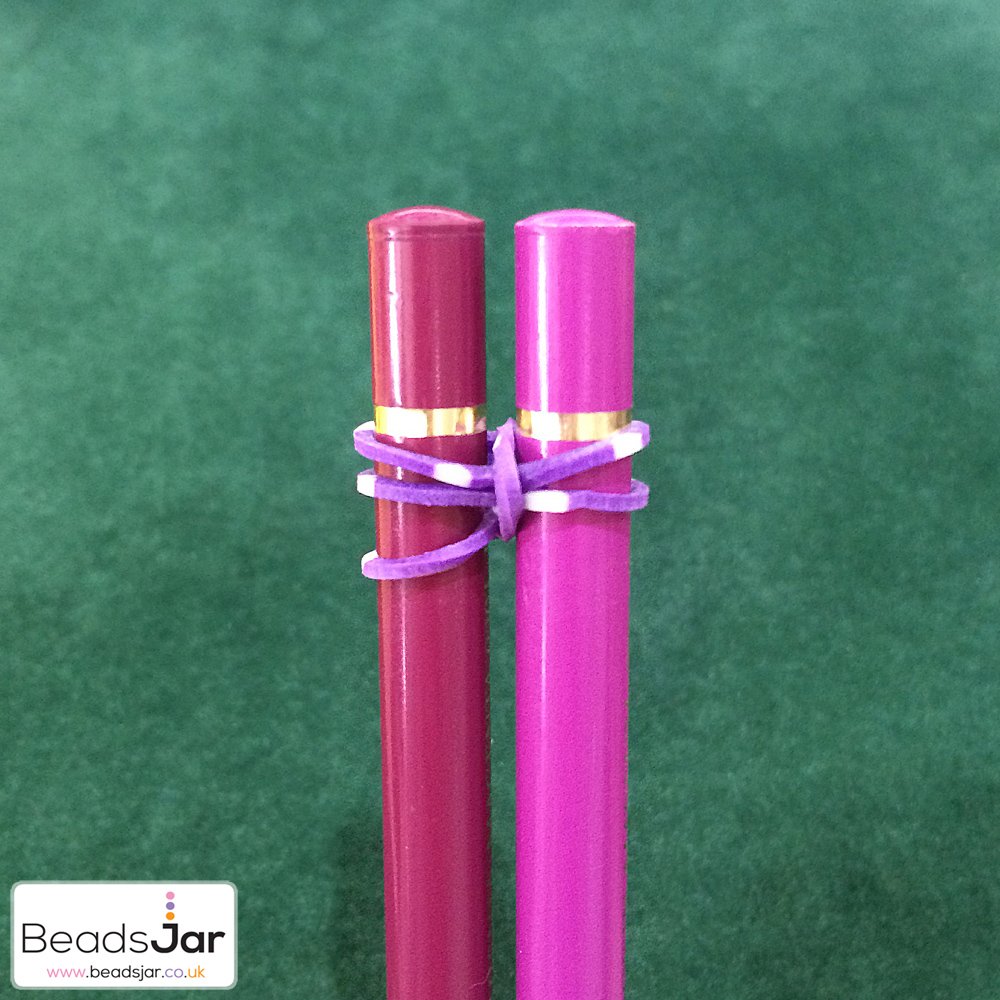
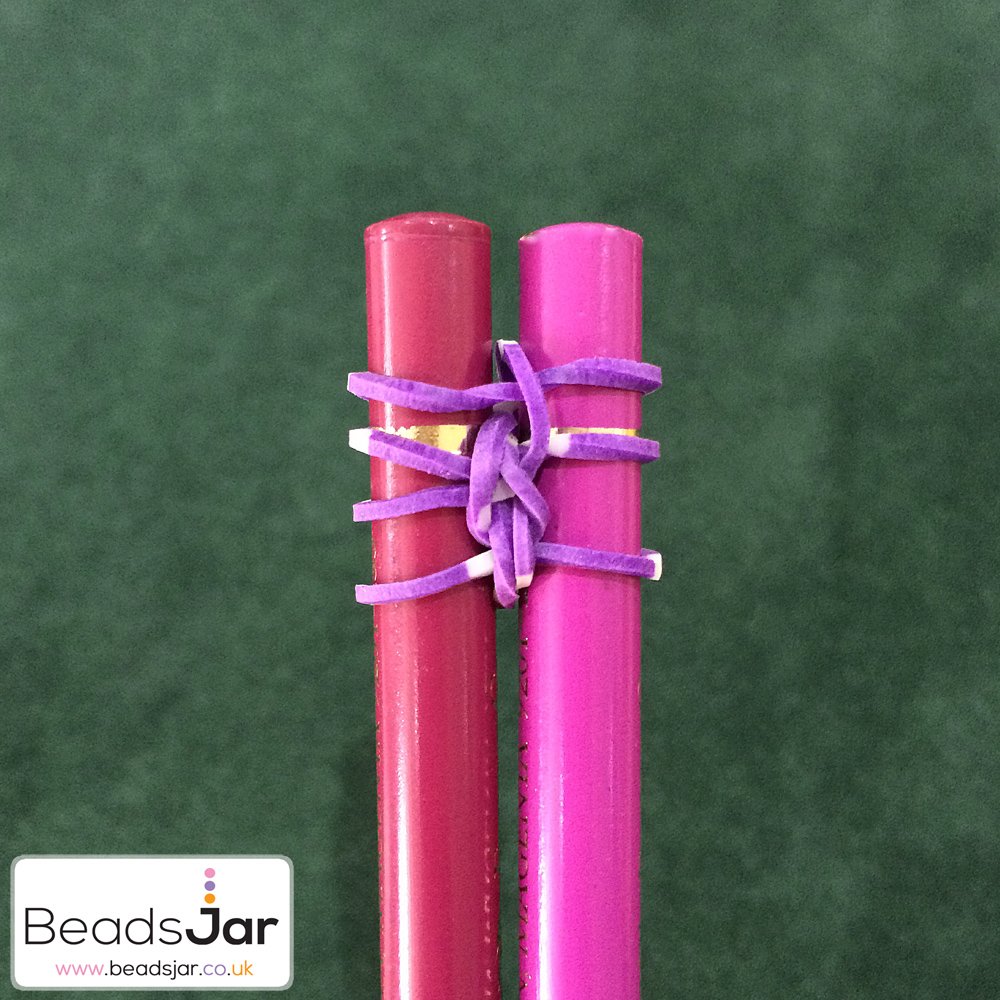
Step 4
Repeat on the left side.

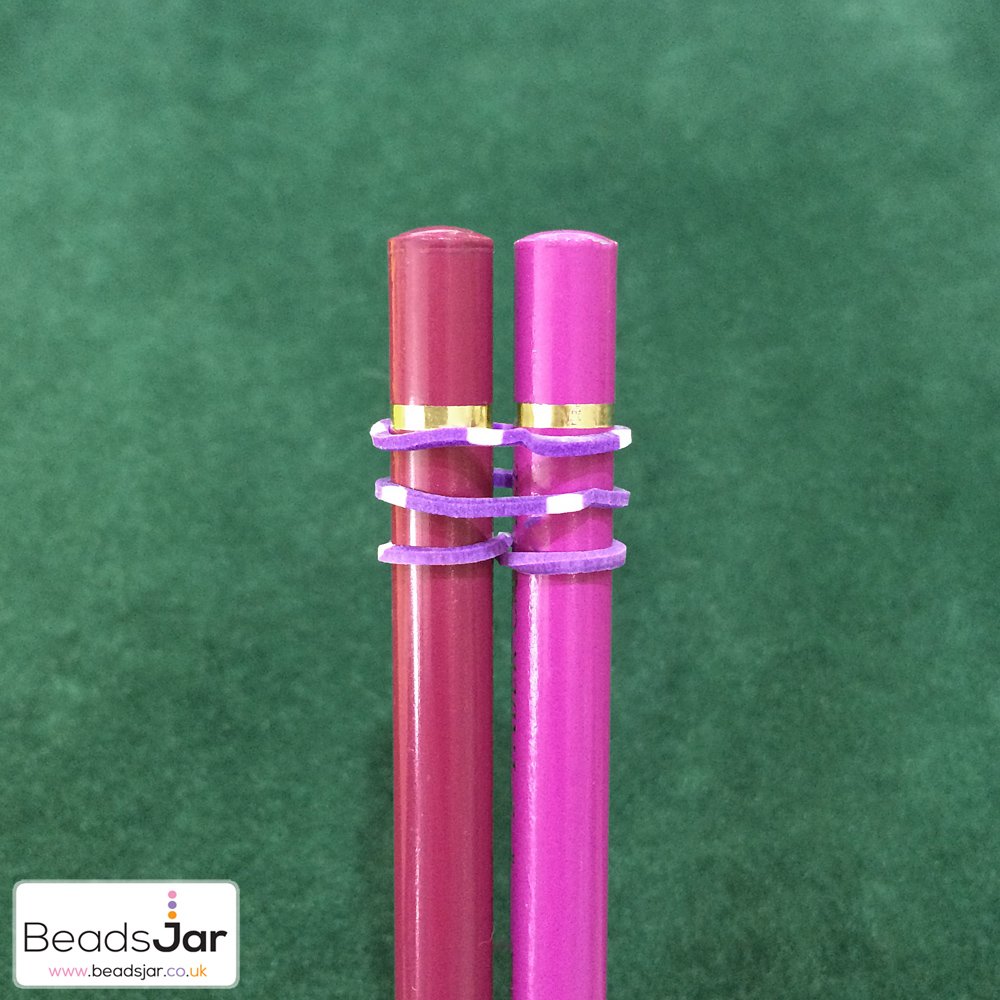
Step 5
Place two more bands above the stitch you just created.
Step 6
Take the loom band next to the bottom band on the right and take up and over the top two bands.
Step 7
Repeat on the left side.
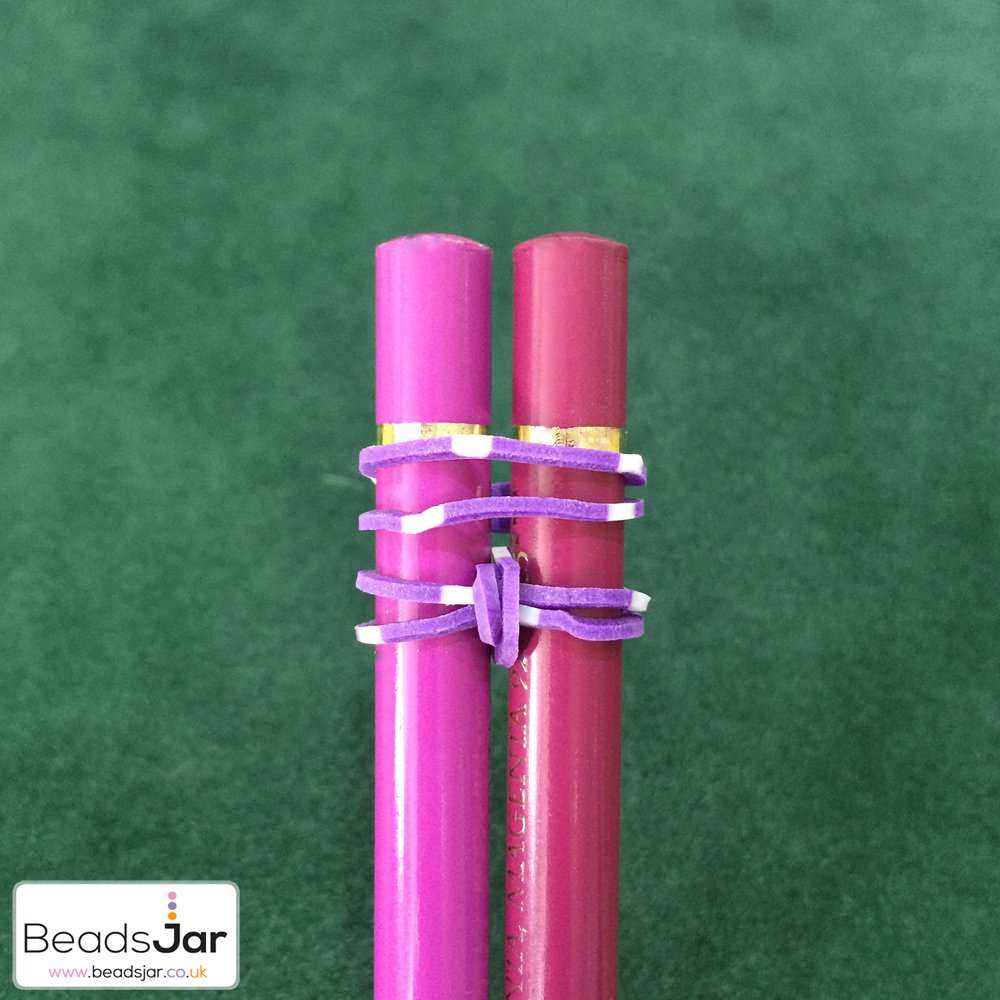
Step 8
Place another loom band on top.
Step 9
Take the third band down on the right up and over the top two bands.
Step 10
Repeat on the left side, then place another loom band on top.
Step 11
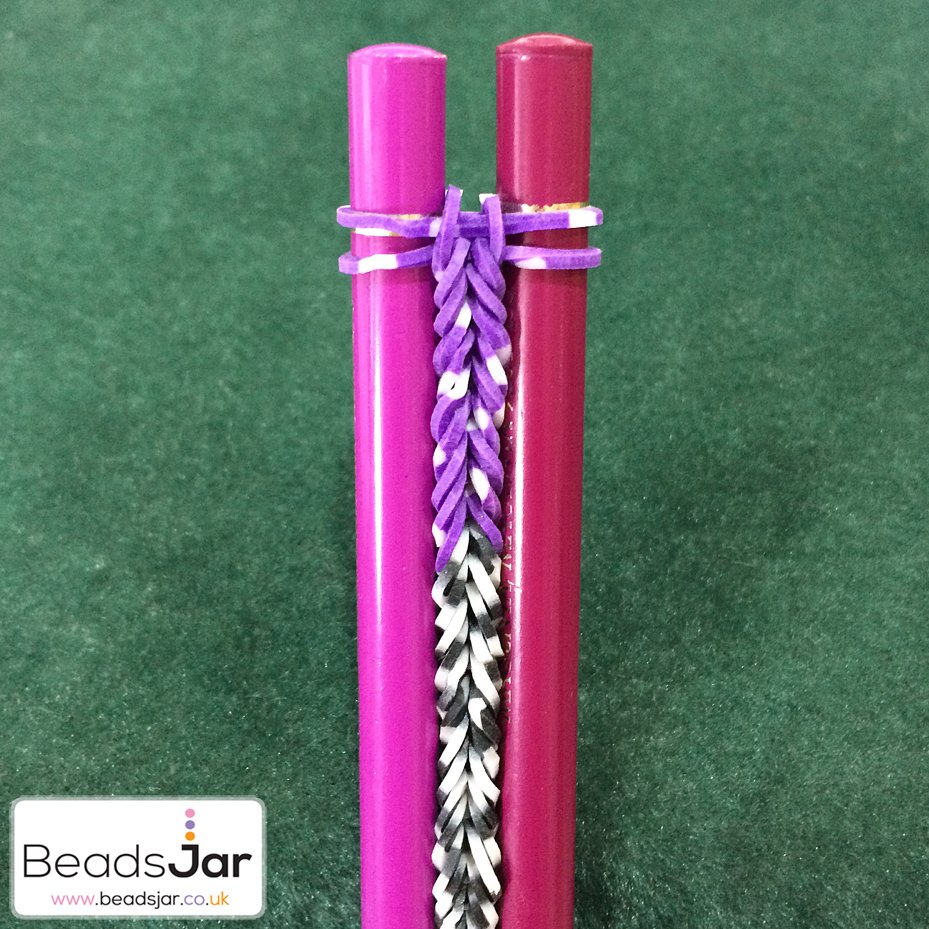
Continue with the purple until you have approx 1 inch of bracelet, then switch to the Black and White bands. Continue with these until you have 3.5 inches of black and white. Then add another 1 inch of purple.
Step 12
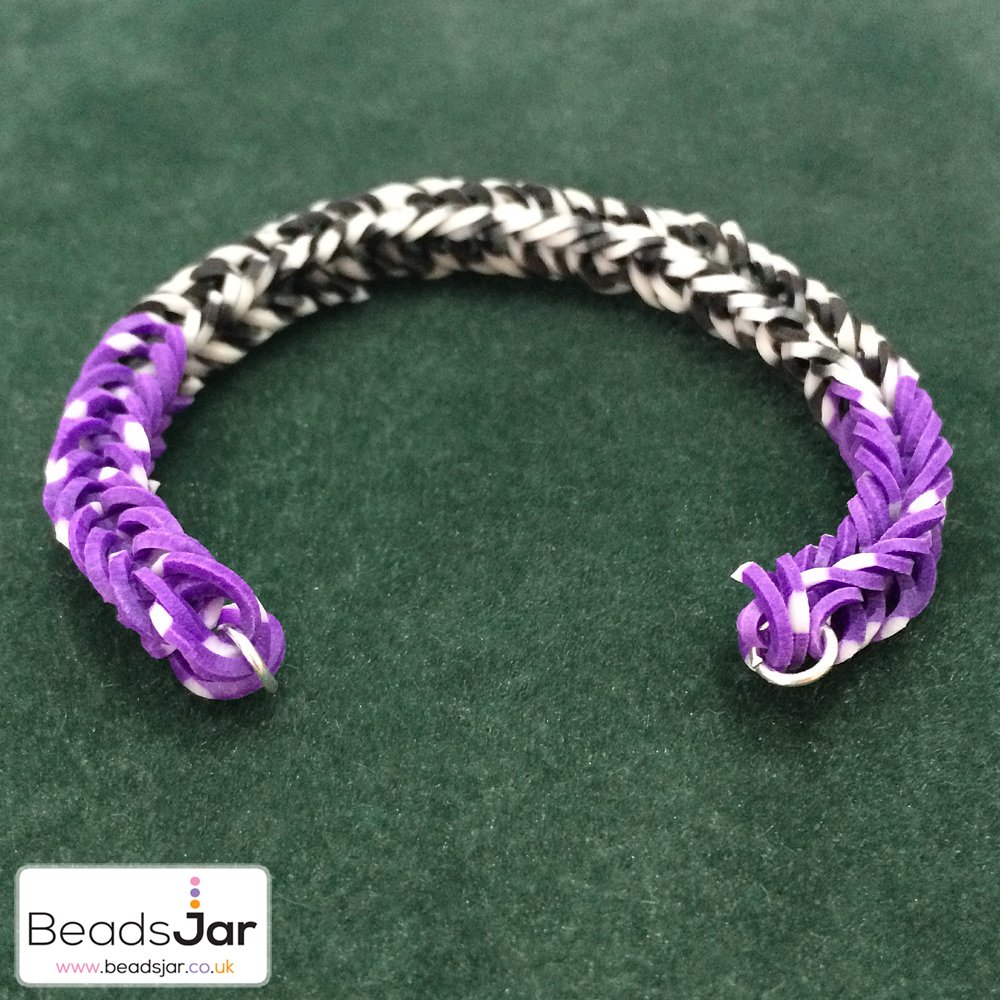
When you have your desired length, carefully unhook the top loops off the pencils and hook them all onto a Jump Ring, and twist closed. Repeat this step on the other end.
Step 13
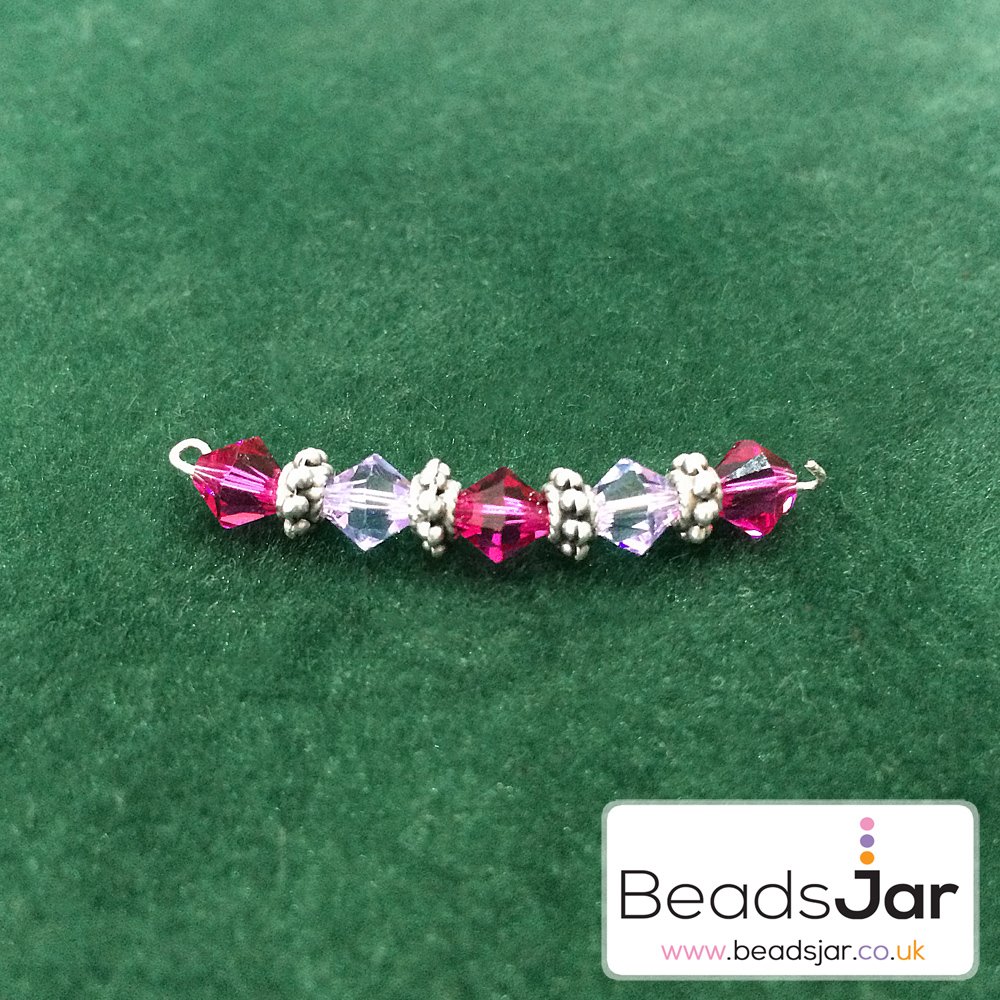
Then take a 2 inch length of Silver craft wire (at least 0.6mm wide) and create a loop at one end using round nose Pliers. Before closing fully, hook this onto one of the Jump Rings on the bracelet. Thread on 5 Swarovski Crystals with 4 spacer beads inbetween, then create another loop at the other end and hook onto the jump ring on the other side of the bracelet. Bend the wire slightly so it follows the curve of the loom bands.
There you have it...a loom band bracelet minus the neon that us grown ups can wear!
What do you think? Would you wear it?
Emma xo


Leave a Comment