-
Your shopping cart is empty!
MENU
Your shopping cart is empty!

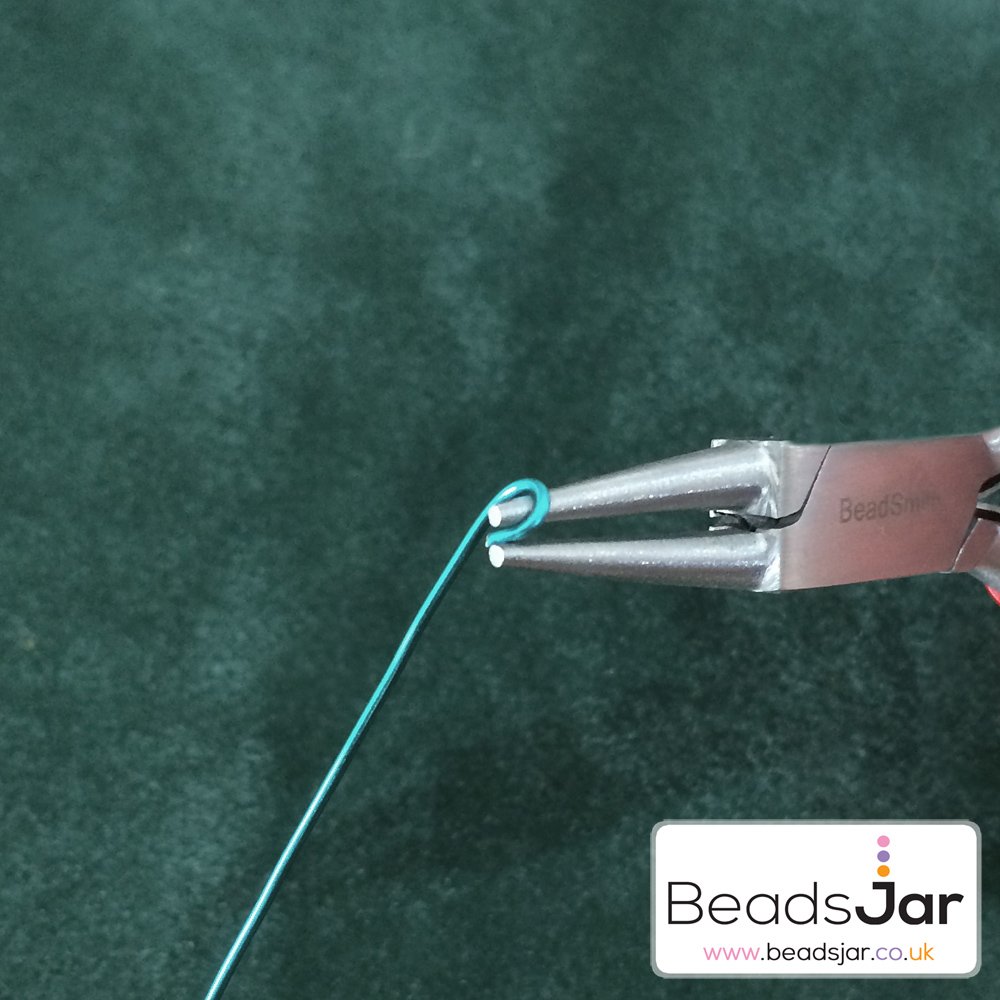 At one end of wire use your round nose pliers to create a loop by bending it to the right hand side. The loop should measure approximately 3mm.
 Place the tips of the pliers directly underneath the loop you have created. Bend the wire to the left hand side so that it is laying horizontally underneath the loop.
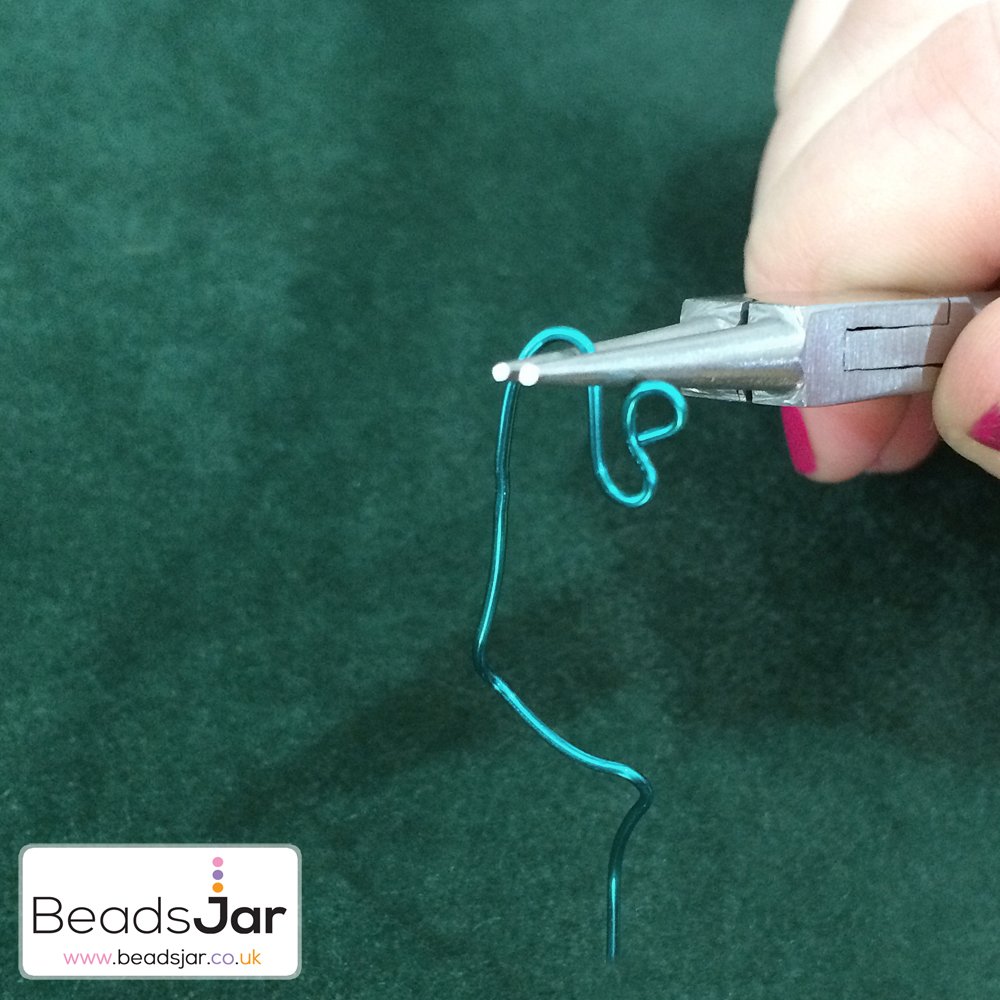 Approximately 1cm to the left hand side of your horizontal wire, carefully move the wire underneath with your pliers in the opposite direction so that you have created a round bend. The wire should finish parallel underneath your horizontal wire with the end of the wire on the right hand side.
 You then need to repeat this step but from the right hand side. Approximately 1cm along, inline with your first bend, twist the wire underneath to create a third bend which leaves your wire end to the left again.
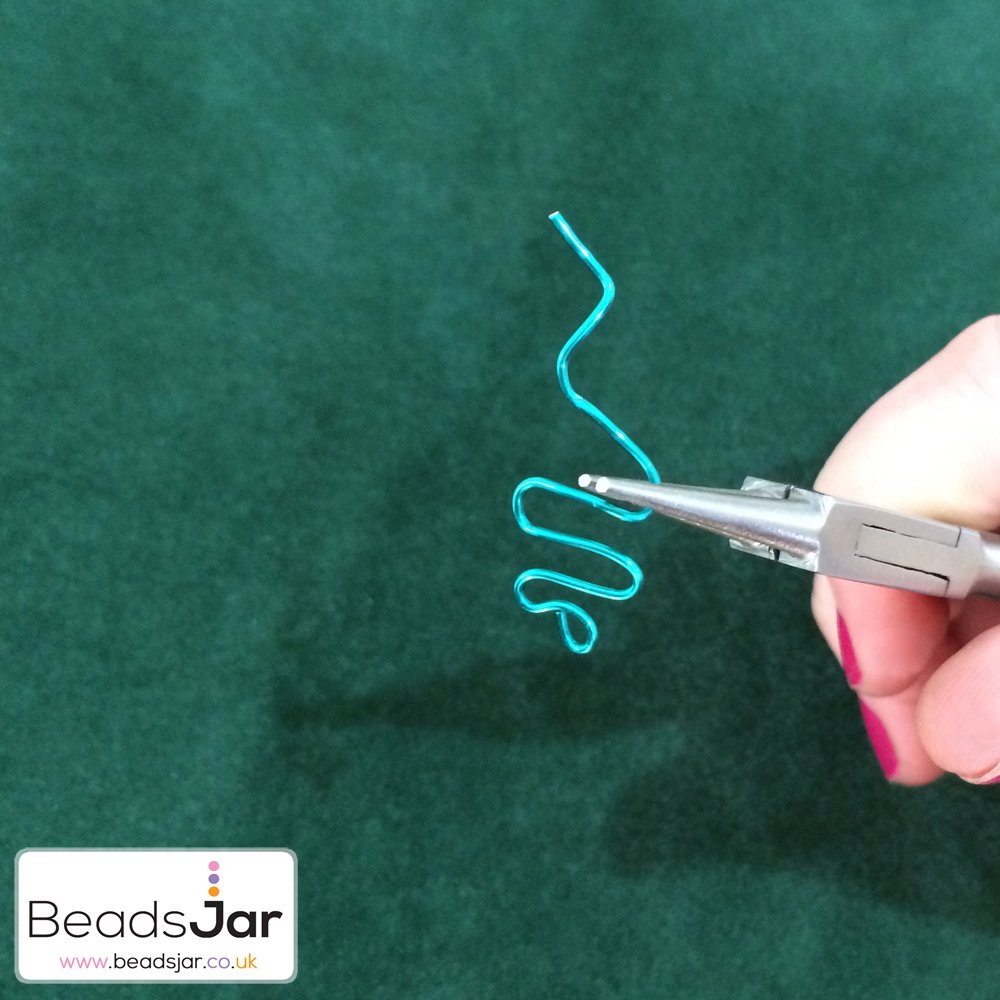 Use your round nose pliers to grasp the wire that is directly underneath the bend on the left side, this should be approximately 1cm along your wire. Use your pliers to bend the wire underneath to create an identical loop finishing on the right hand side.
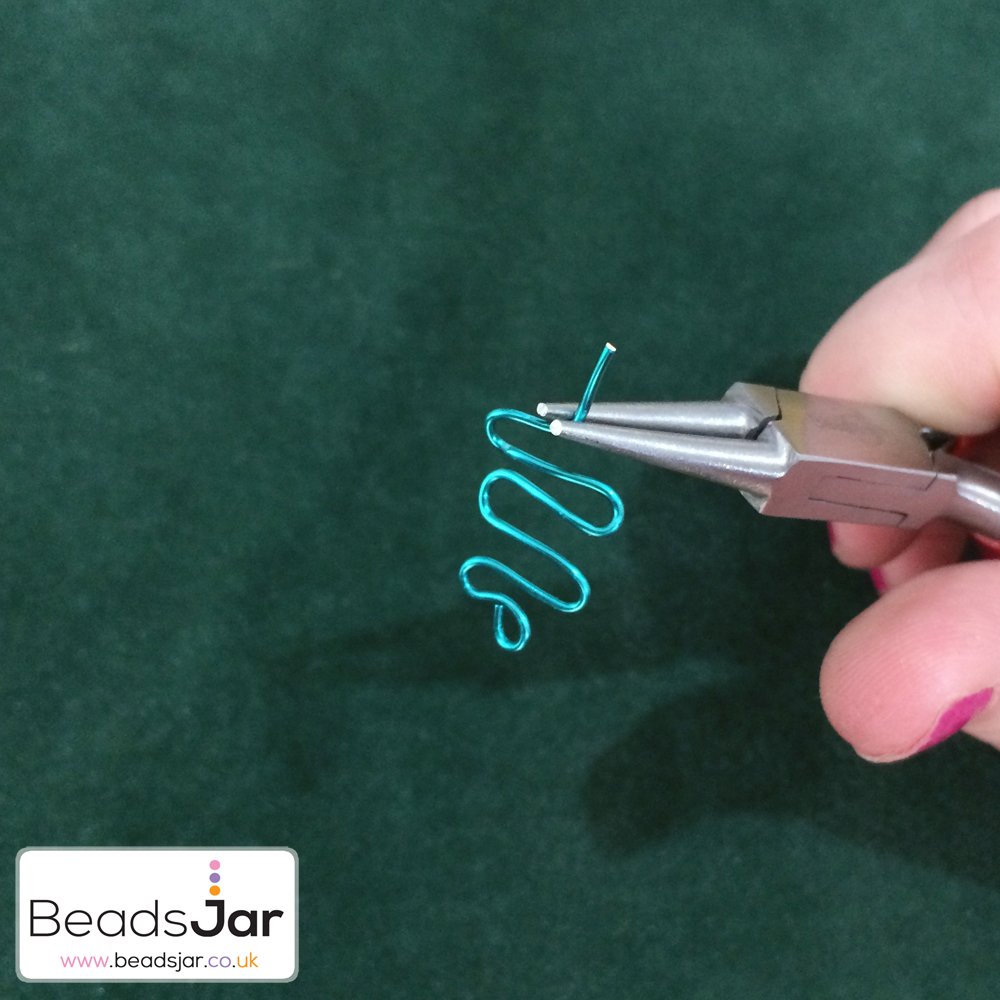 Complete your next bend from the right hand side underneath the two bends you have already created. Once this is laying approximately 5mm along horizontally to the left hand side, use your pliers to bend the wire 45 degrees so that it is vertically underneath.
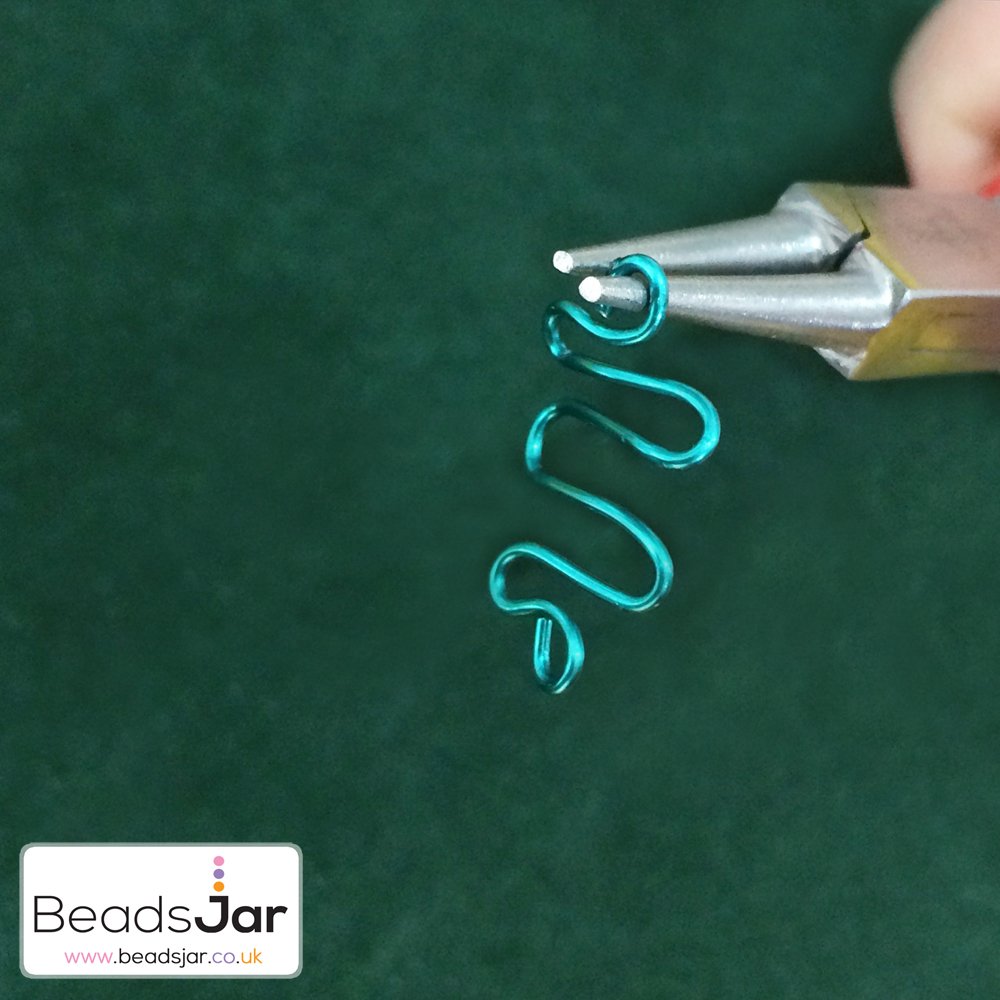 If you have any excess wire, this is your chance to trim it with the side cutter pliers. The amount of wire you have left should be enough to create a loop at the bottom of your bends. Similar to the first loop you made, use your pliers to bend the wire inwards to create another loop similar sized.
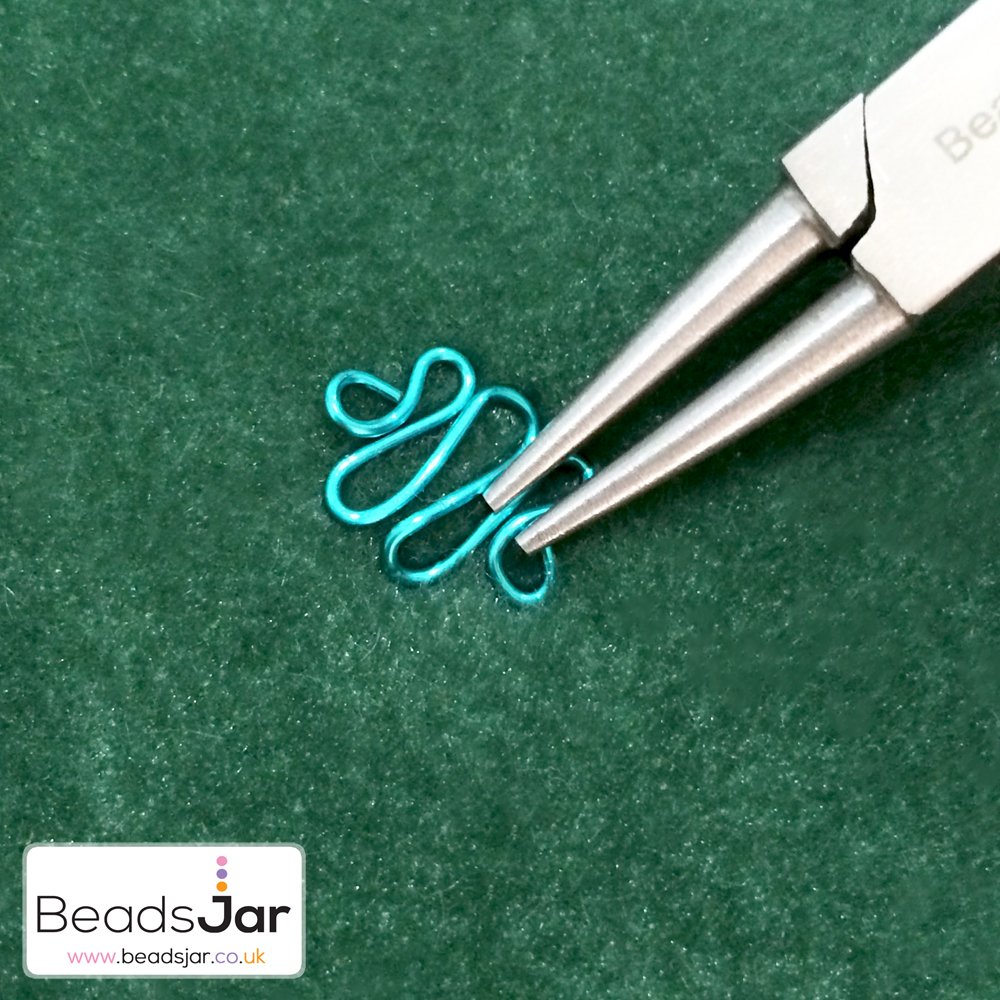 You should now have completed all of the bends for your squiggle. Lay your wire design out flat in front of you and use your pliers to push all of the bends together so that they look neat and are touching. Adjust them as necessary until you are happy with the finished result.
 Repeat these steps with as many pieces of wire that you require in your design. They can be used in necklaces, bracelets and earrings. The loop on either end of the squiggle makes them easy to link with Jump Rings to connect them together or to add charms. Express your creative side and introduce wirework skills to your jewellery designs!
Take a look at our guide on how to make squiggle heart earrings for inspiration and ideas of how to incorporate this fun squiggle to create a fashionable piece of jewellery.


Leave a Comment